Intune Windows Autopilot Steps-by-Step.
What is Windows Autopilot?
Windows autopilot is a modern way to manage or image a PC, wherever users are as long as they are connected to the Internet. You can test in Hyper-V.
Benefits of Autopilot:
Making it easier to set up, configuring through the internet, requiring no manual intervention, letting users take charge of the setup, adjusting settings based on user groups, working well with up-to-date management tools, ensuring devices meet security standards, and smoothly updating features.
Intune Windows Autopilot Steps-by-Step?
Sing-in with your tenet : administrator@xyz2024a.onmicrosoft.com
Click on Admin centers > Identity
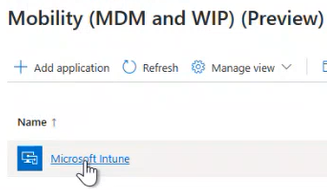
Now, In https://entra.microsoft.com > search Mobility (MDM (mobile device management) and WIP)
Click on “Microsoft Intune”
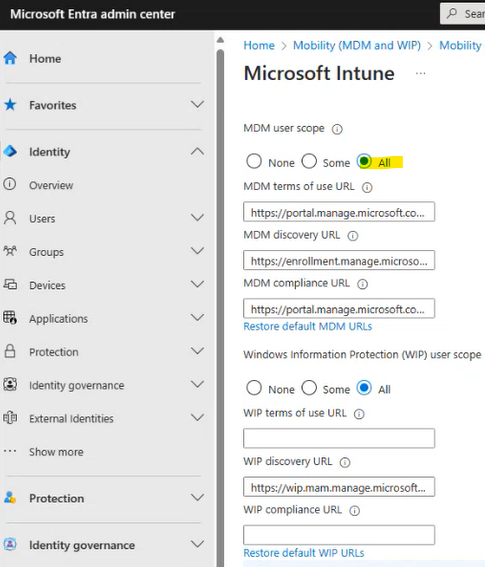
Now Enable Intune Policy:
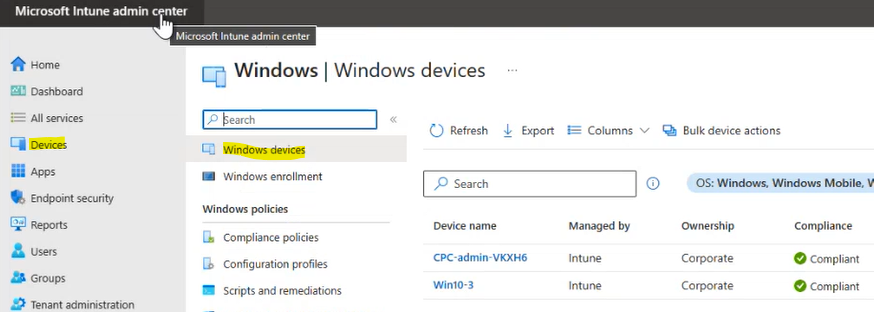
Go to Intune portal page: https://intune.microsoft.com
Click on Devices (from left side) > Windows (by Platform) > windows devices

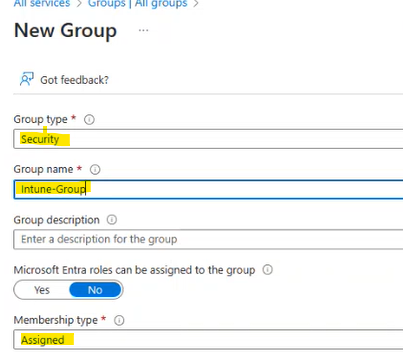
Now create a windows security policy group, it will help to apply policy on many users at one time.
Click on Groups (from left side)
Create New Group > click on create.
Now create policies:
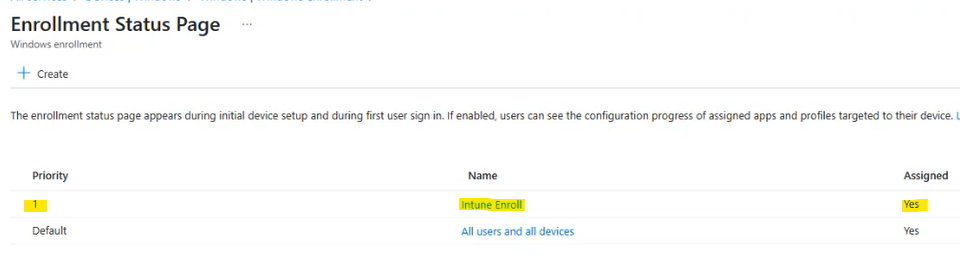
Go to Devices > Windows > Windows Enrollment
Click on “Enrollment status page” option
+ Create a new Enrollment status page and keep the configuration below as it is.


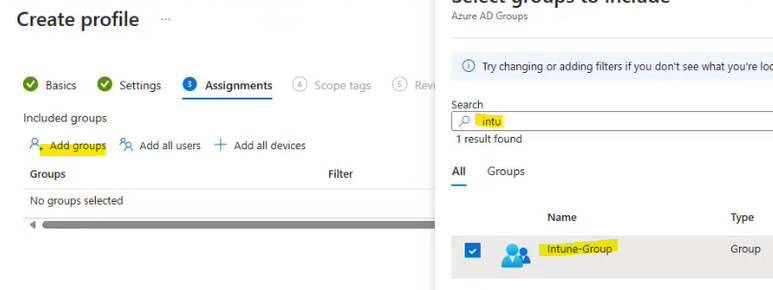
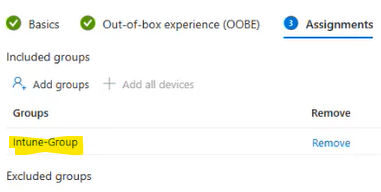
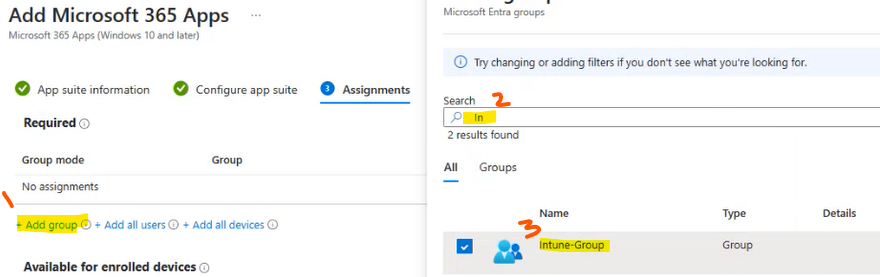
Now assign the policy to previous group “ Intune-Group” So now go and +add groups
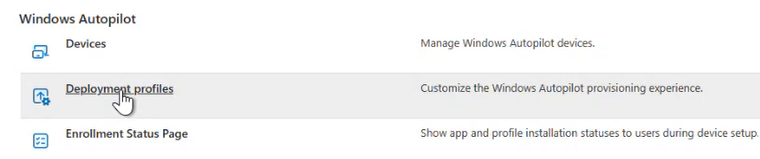
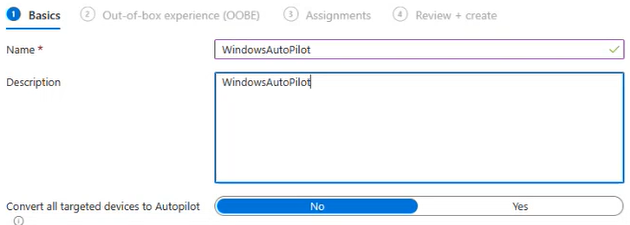
Now Create Windows Autopilot “Deployment Profiles”
Now Go to Devices > Windows > Windows Enrollment >
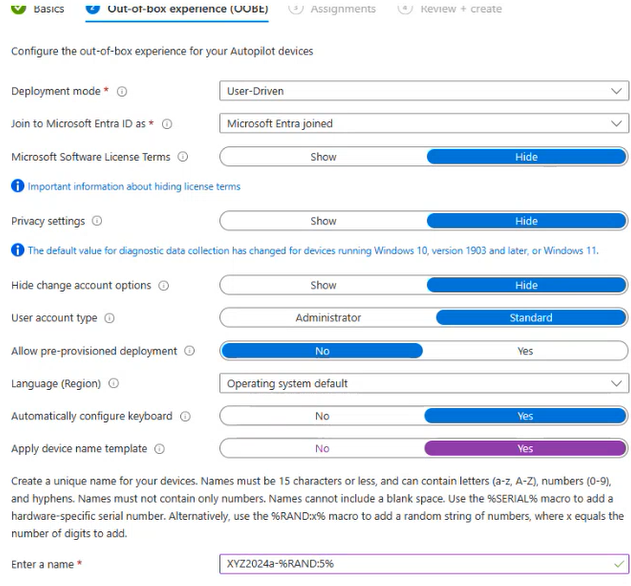
Now “Assignments” option: To whom we can assign the above policy, so add the groups click on the “Add groups option.”

Now you can see we created a Deployment profile. Now we can apply this deployment profile to any user or groups.

Upper side, work we finished for “Fresh Windows” but now start to do for “Custom Windows” where we can add different applications.
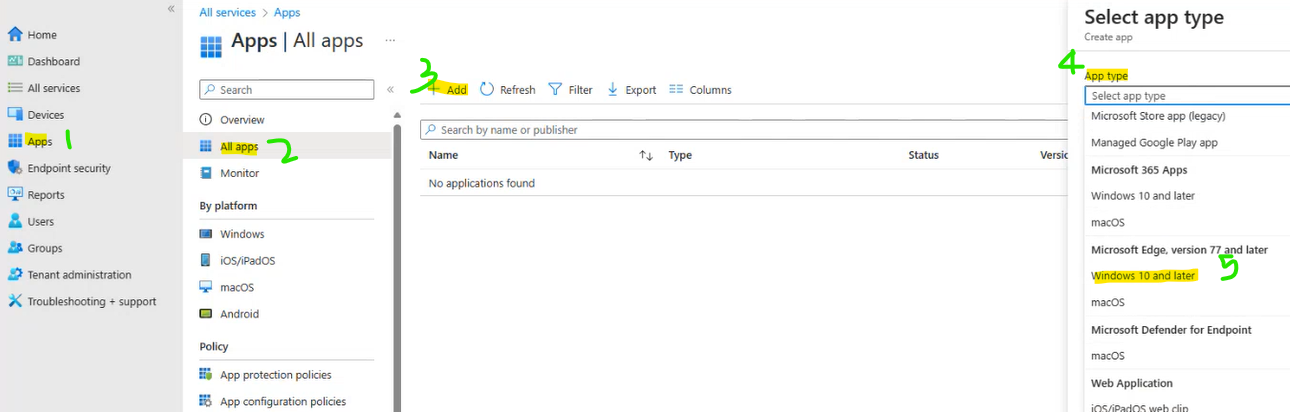
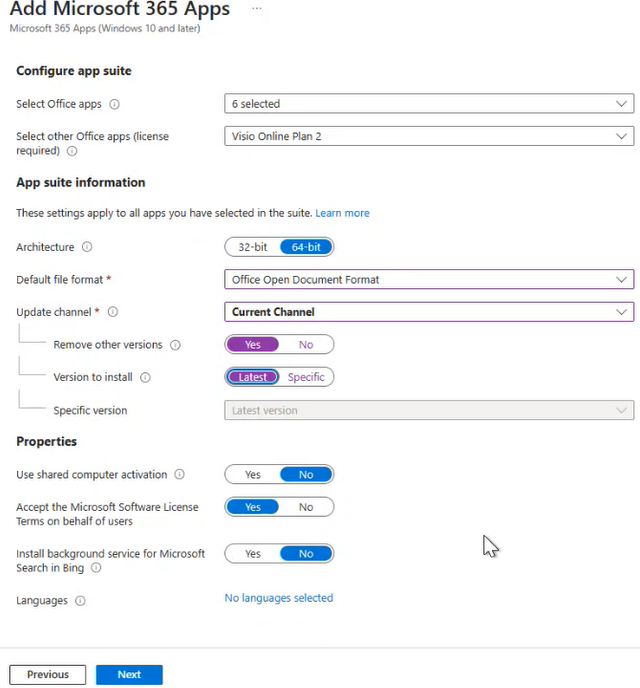
Click on Apps options > All apps > +Add
Choose “App type” from the dropdown list
Choose “Microsoft Edge, Version 77 and later” > windows 10 and later
Now assign this configure to any groups or users: so add the group or user.

Now add “Autopilot Devices”
Click on Devices > Windows > Windows Enrollment >Devices (it is empty now)
You have to add User device manually
For that you should “Import” device or computer’s serial number
(normally, the company gives a .csv file of the serial number of the computer, that we can import here.)

In our case, we can get the device ID from Hyper-V Windows 11. Let’s get the Device ID
Add Windows 11 PC in Hyper-V.
Get the windows 11 (serial number) or device ID.
Use any cloud user’s email id (bob.bobson@onmicrosoft.com) to set up for work or school (microsoft)
Open powershell (administrator) and go to this link “Manually register devices with Windows Autopilot | Microsoft Learn”
Copy below commands and paste in Powershell.
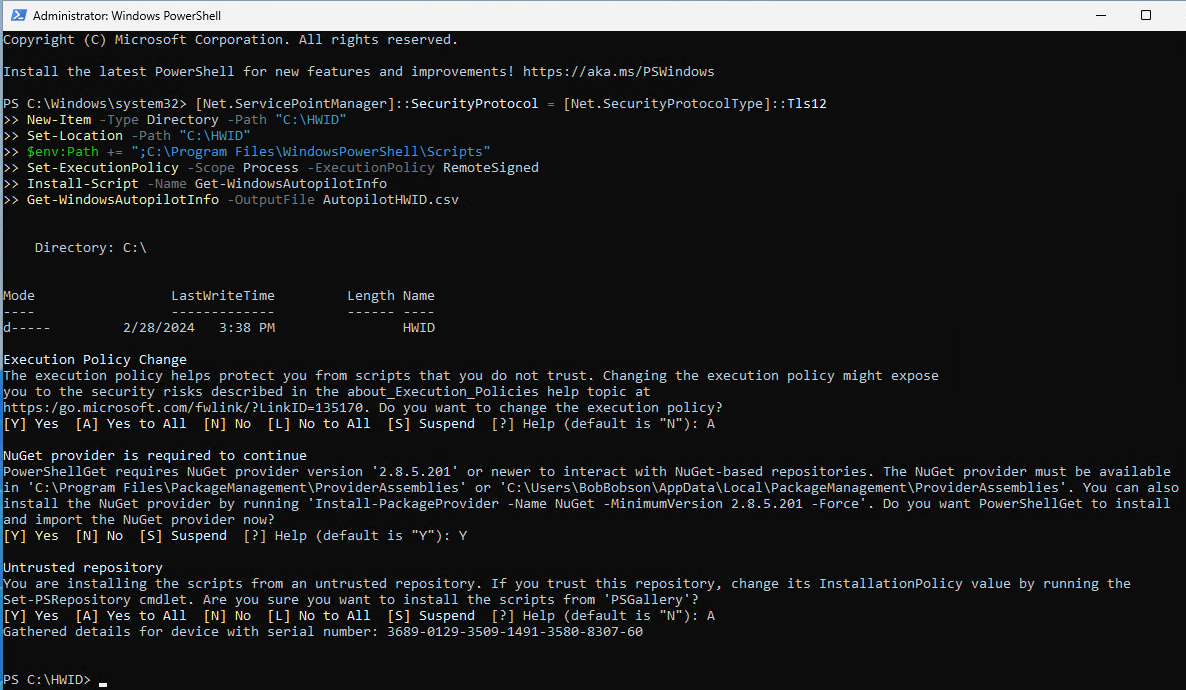
Use the following commands from an elevated Windows PowerShell prompt:
[Net.ServicePointManager]::SecurityProtocol = [Net.SecurityProtocolType]::Tls12
New-Item -Type Directory -Path "C:\HWID"
Set-Location -Path "C:\HWID"
$env:Path += ";C:\Program Files\WindowsPowerShell\Scripts"
Set-ExecutionPolicy -Scope Process -ExecutionPolicy RemoteSigned
Install-Script -Name Get-WindowsAutopilotInfo
Get-WindowsAutopilotInfo -OutputFile AutopilotHWID.csv
Now go to below location:
Double click on C: drive > HWID > AutopilotHWID.csv
Copy that file (AutopilotHWID.csv) and send it into Teams chat or other ways or gmail AND download it on your local computer. The purpose of this is to import that file on the cloud side.
We need only this serial number: 3689-0129-3509-1491-3580-8307-60 (of windows 11 device)
Now we have to go to https://intune.microsoft.com
Click on Devices > windows > Windows enrollment > Devices (windows autopilot area).
Now import the “AutopilotHWID.csv” file. (it will takes some time to sync to time)
Time to time, click on Refresh and Sync options.

Now Add this device or serial number into the Group.
Now Go to Groups > search previous group: Intune-Group
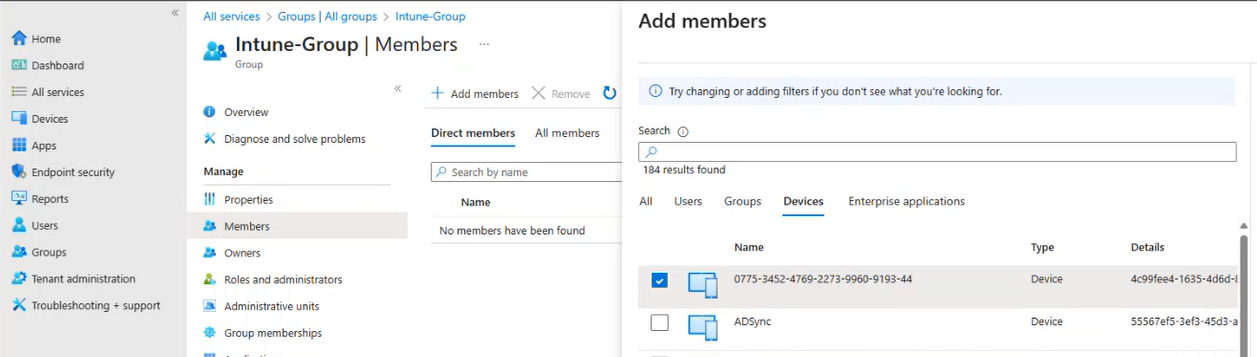
Click on Intune-Group > Members > +Add members>Devices (see “add members’” underline blue color “Devices”)
Assign the PC (that serial number) or device to one of the Intune-Group members.
Go to Groups > search “Intune-Group” > Members > + Add Members > Devices
Search Device name:
If you don’t know device name ,
open Hyper-V win11 computer,
Command prompt > Whoami
You will see the device name.
Select device name (See below we select device Name)
Click on “Refresh” button

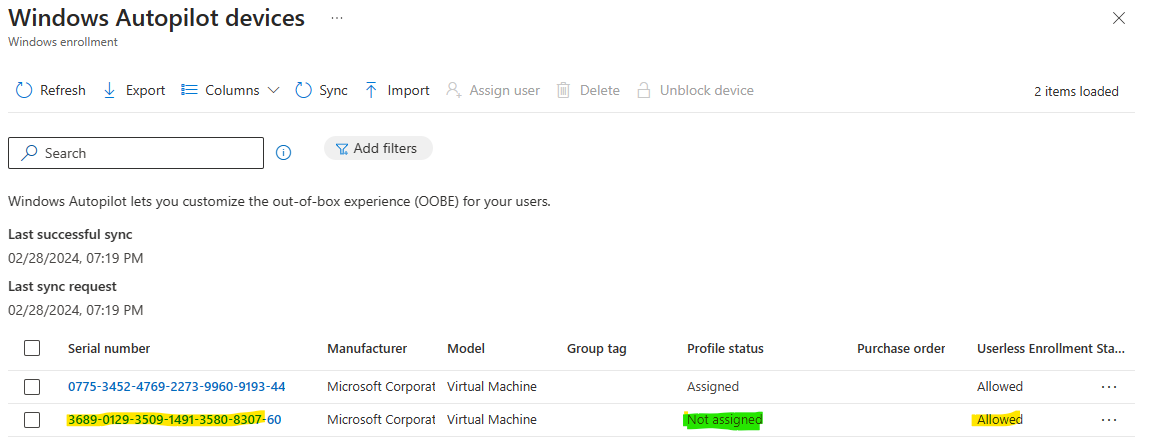
Go toDevices > Windows > Windows enrollment > Devices (it is not assigned yet, you can see under “profile status” - Not assigned)

Now Sync the device , so click on “Sync” option (account was synced less than 10 minutes, please try again )
After sync it you will see Profile status “ Assigned” (see below image) (you can sync multiple devices in one time)

How to add Dynamic Membership rules:
You could create a dynamic rule to include all devices running a specific operating system version or all users in a particular department. This dynamic approach simplifies group management by automating the inclusion or exclusion of members based on changing conditions.
Click on Groups again > New Group > 2. Group type: security
Group name: Dynamic-WindowsOS-Group
Microsoft entra role: No
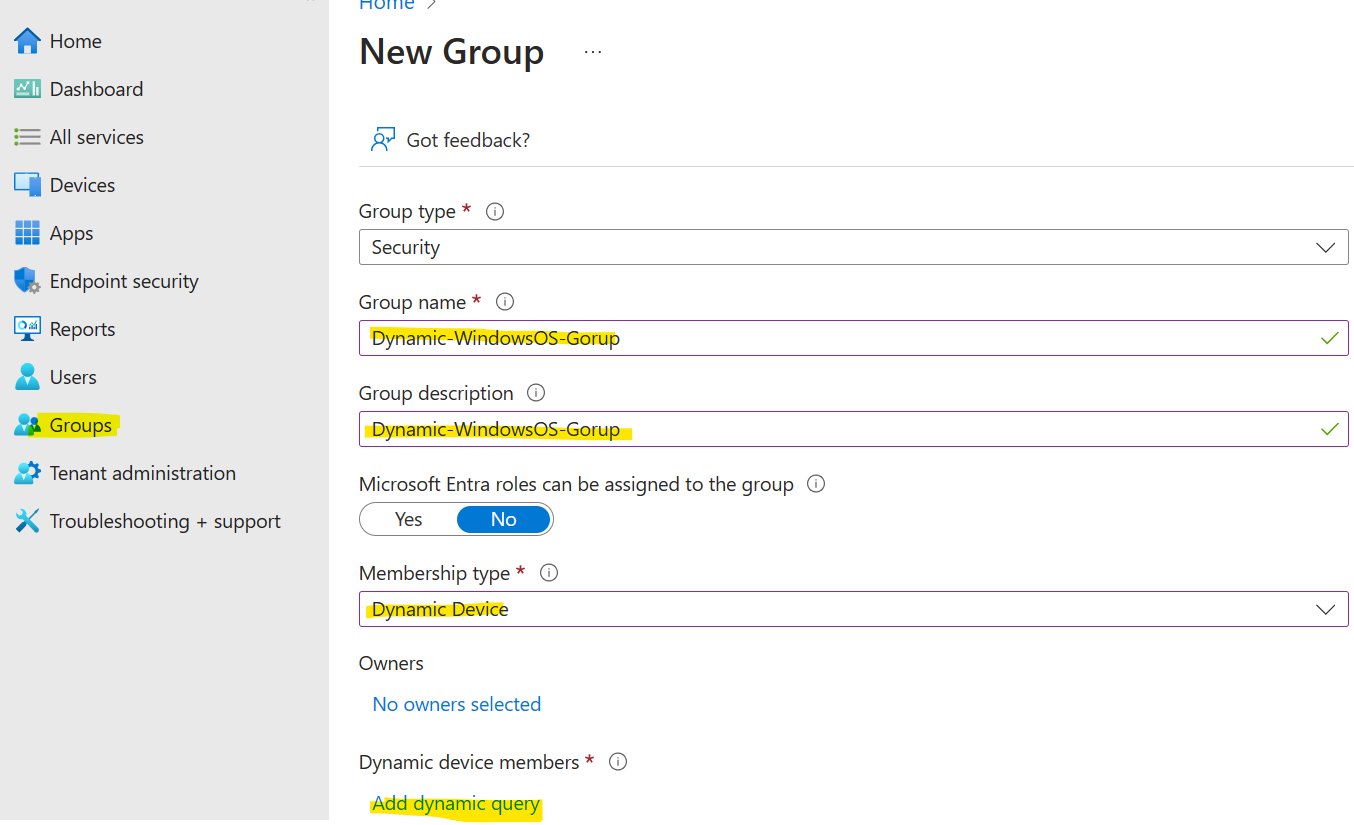
Membership type: Dynamic Device
Dynamic device members * : add dynamic query
Click on :add dynamic query
Click on “Edit”
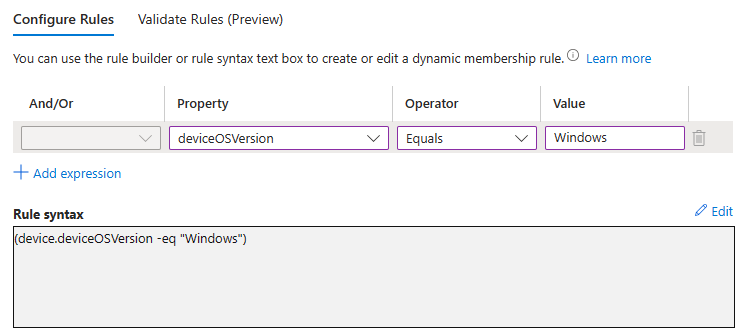
Click on property : deviceOSVersion
Operator: Equals
Value: Windows
Now just click on inside the “Rule syntax” text-area. You will see the syntax below.
(device.deviceOSVersion -eq "Windows")
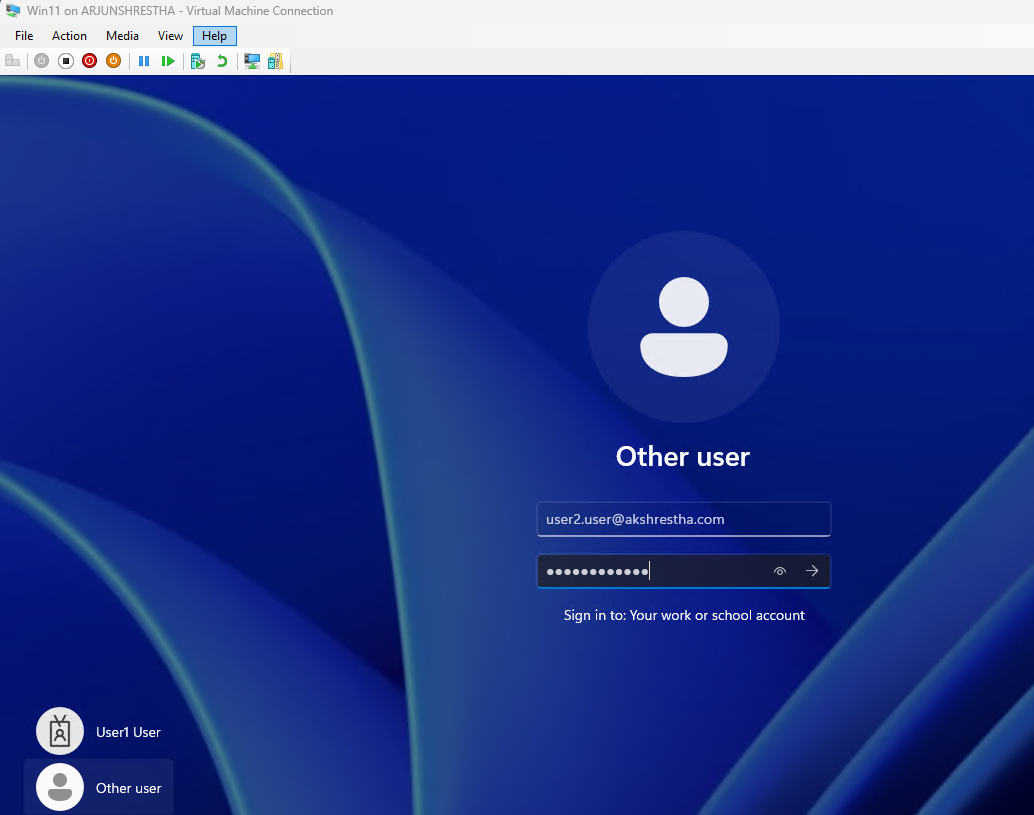
Finally, you should test on Hyper-V
Go to Hyper-V, and Reset PC firstAfter reset pc, login that pc by using cloud user (user1.user@akshrestha.com)
You should see all the apps which you already added in policy.

Comments